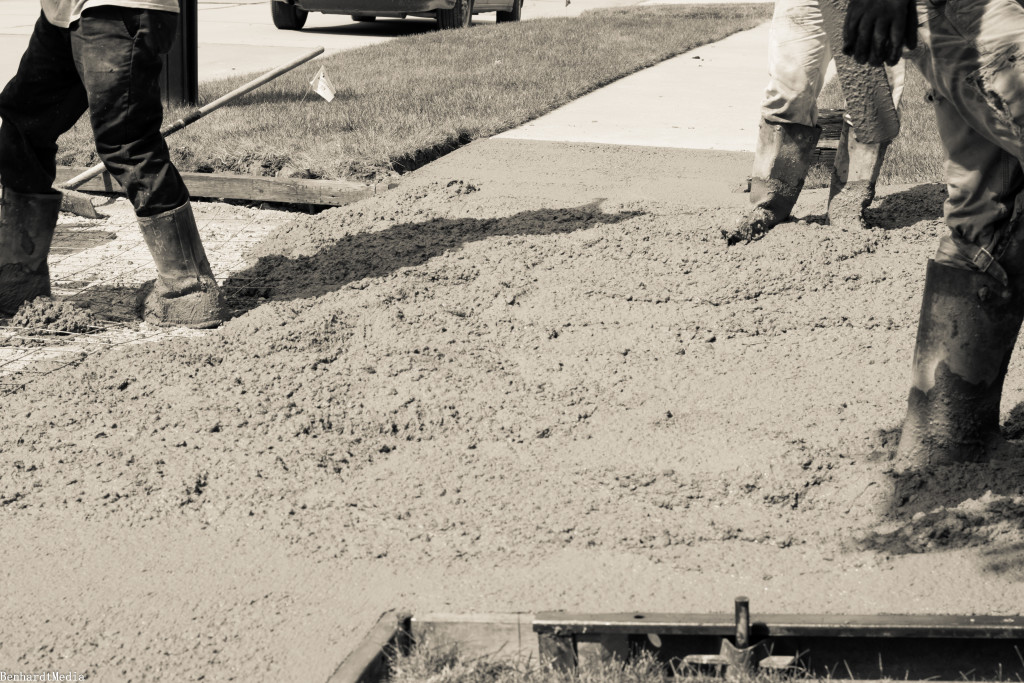
Spring is here in the St. Charles area and it’s time to start planting those concrete patios!
Author: Bob Benhardt
Concrete Is Art
A fine fella whom I plan on sharing a nice bottle of tequila with one day soon wrote an article titled Cooking as Art which popped up on my Twitter.
Immediately the stars connected, the sun lined up and a beam of light shone threw the jeweled piece of the staff indicating the proper direction of the treasure. (Yes, just like in Raiders of the Lost Ark.)
In the video I mentioned how concrete and bbq are both forms of art and I stand strongly behind that.
Which, the timing of it all brings about this article.
When one goes to wrassle concrete each and every time one must be on their toes. Like getting into the ring with an opponent whom has a base move set but is also always bringing something new to each contest.
So it is with concrete.
I cannot tell you how many times I have imaginary elbowed dropped concrete over the years.
Indeed it is a love hate relationship. I reckon because concrete was and still is my first true love in the construction industry.
Each time one dances with concrete the steps are the same but the song is different. Making each dance a unique and interesting combination of work and timing.
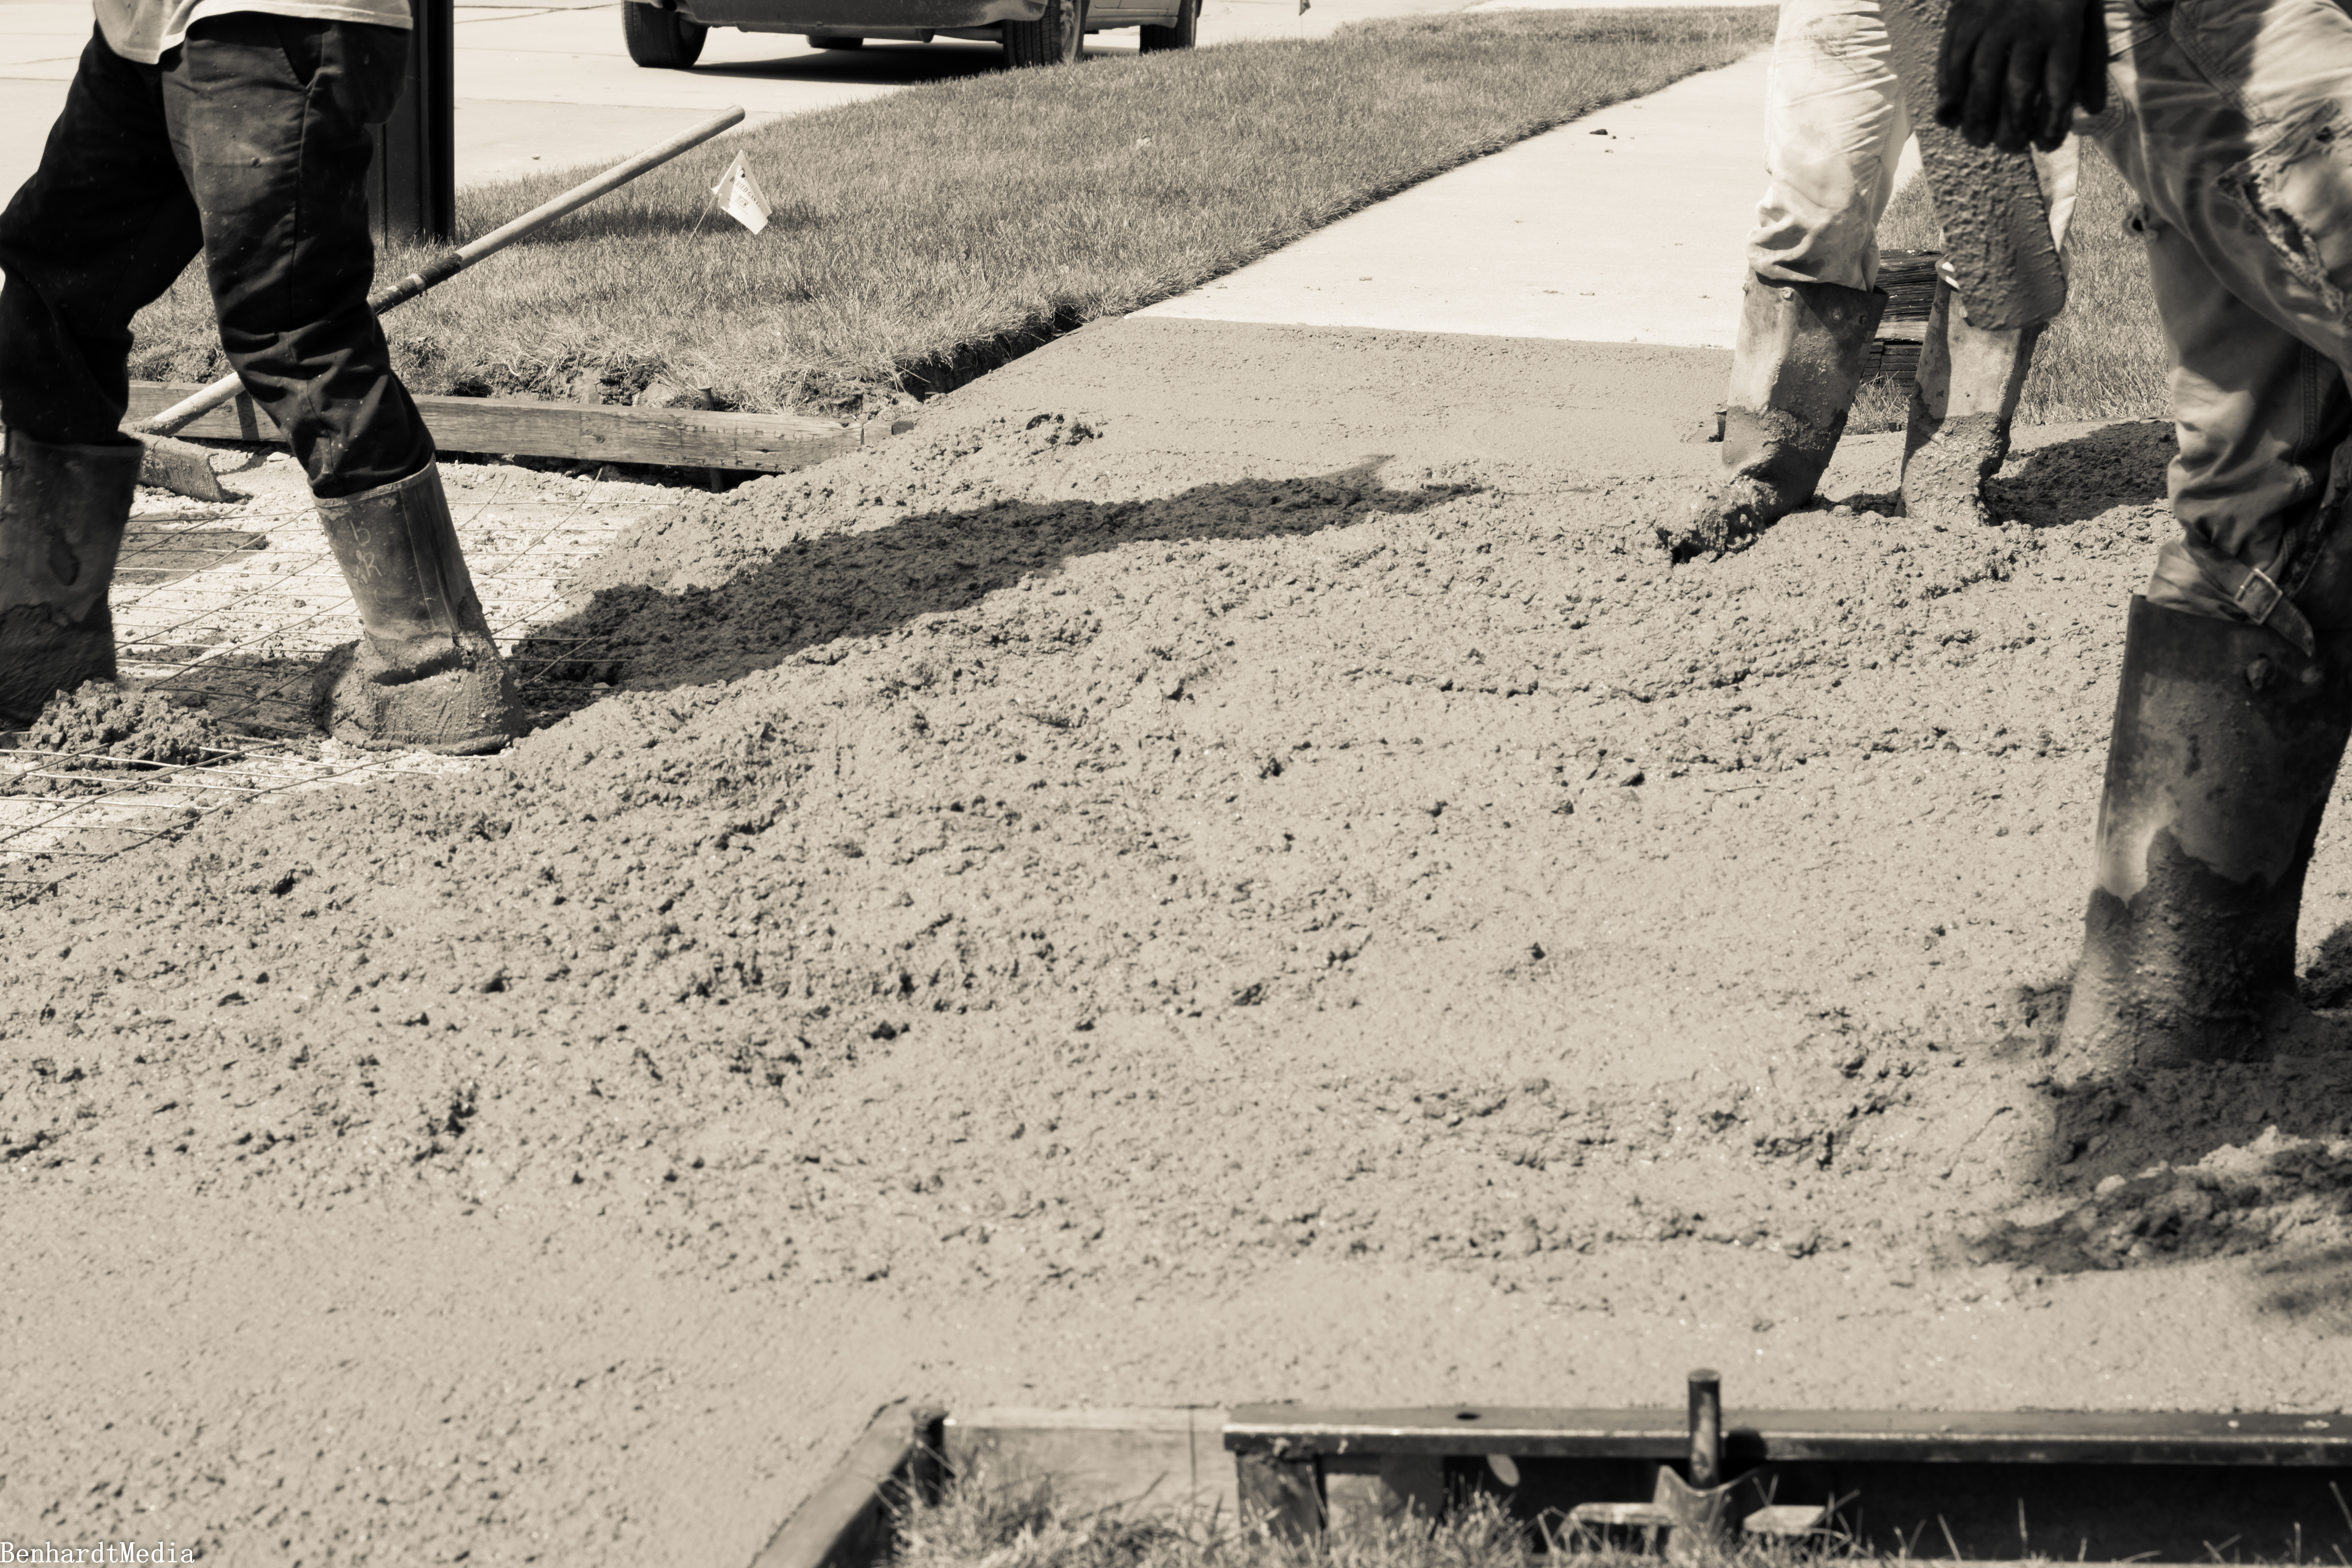
Some days the tune is slow and the concrete surface never takes off to tighten up enough to finish properly.
Other days the tune is reminiscent of the Benny Hill Theme Song and we cannot finish the surface fast enough.
Concrete arrives early. Arrives late.
Mother Nature decides to drop a deluge of rain as soon as the concrete is down even though there was not a cloud within four thousand miles at the start of the day.
Or the trees want to get in on the gag and drop pollen or the damn whirlybirds in the spring or those never ending leaves in the fall.
Maybe we’ve busted our ass getting the concrete down and finished, throwing the last tool on the truck and the homeowner somehow forgets we just poured concrete in their backyard and let’s their dog out.
(Yes it’s happened)
Sometimes we work it while feeling as if we got transported to Antarctica expecting penguins to march around the corner at any moment.
Other times one just wants to crawl in the coffin and let the smothering heat and humidity put the final nail in.
Yet, through all that I love concrete. There is nothing more damn satisfying than seeing the final results of all the angst and effort.
Something which will last for years and years to be enjoyed, utilized and yes, even oohed and aahed over a time or two. (It’s happened)
Which kinda leads me to an interesting conversation I had last week. Ran into a guy whom ‘wanted to get into concrete’. Which first off, for anyone whom thinks concrete is something to ‘just get into’ it’s not. I’ve had homeowners rattle on about how great they are at everything with concrete being the last thing on their list. I simply reply with, “Run”. Which gets a blank stare. Then I repeat, “Run and don’t ever look back. I do this because I knew no better. It’s what I cut my teeth on. I walked into. It found me. It trapped me. Run while you can, you don’t want to mess with this stuff. It’s a mean ornery son of a gun”
Anyways, back to the happenstance meeting with the guy whom ‘wanted to get into concrete’. His thinking was to bring the pretty stamped stuff to the ‘masses’
Uhm. No.
And this bothered me. A lot
I’m not here to cheapen the love I have for concrete just so ‘everybody can have it’. Nah. Not everybody deserves it.
First off, people whom say, ‘It’s just concrete’ are not my ideal customer to begin with.
Secondly there’s a hell of a lot of pride and effort in even ‘just’ the broom finished concrete, let alone get me started on the stamped and decorative stuff.
Any of it is art. Not everyone has nor should have art. Some people do just fine with pictures produced ‘for the masses’ and I’m just fine with that.
I like people for the most part but I’m not here on this planet to run around making sure EVERYONE has a piece of art in their backyard.
Nah, not everyone.
Fairly certain this fella’s limited edition art works will top out at 5,000.
And I’m just fine with that…
Winfield Missouri In Lincoln County Detached Garage
Custom 36 x 26 Detached Garage & Woodworking Shop
Winfield Missouri Lincoln County


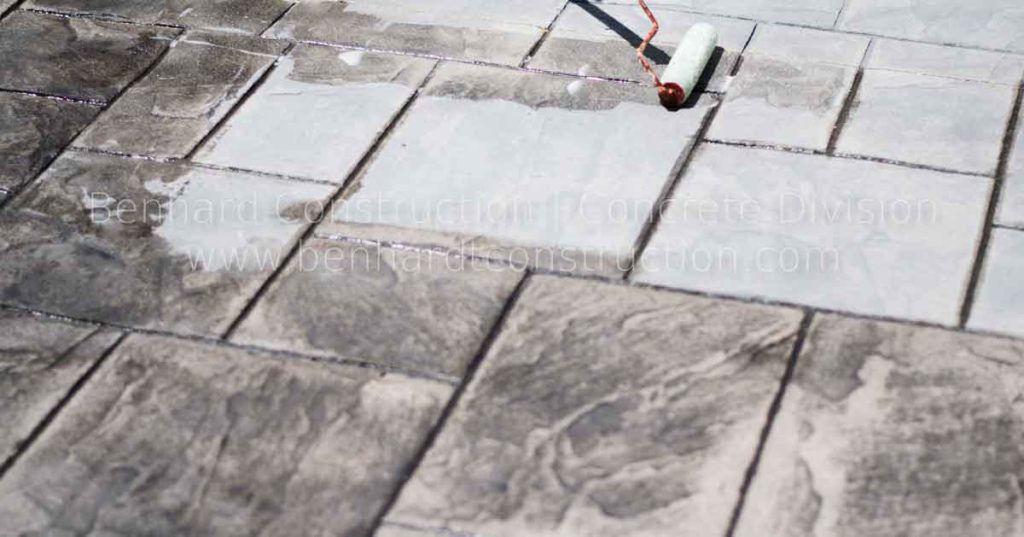
How To Seal Concrete
Seal Concrete like a Pro!
With The Following In-Depth, Informative How-To Guide For Sealing Concrete
Yes, concrete is one of the surliest, meanest and toughest products we can manufacture and mold into a final product.
However, concrete does require some Tender Loving Care (TLC) from time to time.
A little attention to your concrete with concrete sealer will keep your concrete loyal and long lasting for years to come.
To Seal Concrete Protects Your Concrete. Therefore, Extending The Useful Lifespan Of Your Concrete
Seal Concrete Like A Pro!
An In Depth Guide How To Seal Concrete.
Here is a List of Items You Will Need to Obtain in Order to Seal Your Concrete Properly:
- Concrete Sealer
- Flat head screw driver
- Throw away pint cup, plastic cup (something that will hold sealer you need to cut in with)
- 9-inch roller frame
- 9-inch roller cover (backup recommended)
- Chit brushes – Several
- Screw in extension pole for your roller frame
- Painters Tape
- Paper Towels
- Piece of Cardboard or Plastic
- Caution Tape
- Wooden Stakes
- Hammer
- Trash Bag
Benhardt Construction Prefers and Recommends purchasing concrete sealer at Carter Waters.
The rest of the items can be purchased from Handyman Hardware or your local hardware store.
Before concrete can be sealed it MUST be Clean and Dry.
If your concrete is not clean and dry you are simply throwing money, time and energy away while ending up with terrible results.
Assuming the surface is clean and dry and you are ready to start sealing. You have purchased all of your products and are ready to go. Double check the forecast (as well as look at the sky) as you want no rain for at least 12 hours. All clear? Great! Let’s go!
How-To Seal Concrete in Six Easy Steps
How To Seal Concrete Step 1 – Caution Tape Concrete
Caution Tape the Perimeter of the Concrete to Be Sealed
Hammer the wooden stakes into the ground around the perimeter. They do not have to be super close together but close enough so that the caution tape will not droop onto the sealed surface. The stakes just have to be solid enough to hold up the tape in a light breeze – you are not setting up a circus tent.
Once your stakes are set – tie off your tape to the first logical stake, unrolling it as you walk to the next one. Pull some tension on the tape and wrap it a few times around the stake. After you have wrapped it a few times, lighten up the tension on the roll. If the tape stays wrapped between your first two posts – great. If not wrap it better until it does.
Once you get the feel for the tension needed – tape it all off. When you are done taping, you are ready for step two.
How To Seal Concrete Step 2 – Open Concrete Sealer and Stir
Place the cardboard or plastic you brought in the center of the area to be sealed and set the concrete sealer on it.
Using the flat head screwdriver, insert it into the tabs below the outside of the lid and pry the tab outwards. Once all the tabs are sticking out you can gently remove the lid and set it on the cardboard. Take a CLEAN wooden stake or large paint stirrer and stir your concrete sealer for about 60 seconds. Nothing too fast or crazy.
Drag the stake or wooden stirrer from the inside of the container to the outside to clean off the excess sealer – then set it on the cardboard.
Grab your throw away cup and a paper towel. Dip the cup into the sealer to fill the cup up about half way with concrete sealer. Wipe off the outside with a paper towel. Grab two of the chit brushes.

Chit Brush
Put one in your back pocket and keep the other ready for step three.
How To Seal Concrete Step 3 – Use Chit Brush to ‘Cut In’
Now you are going to cut in the concrete sealer to areas close to the home.
If you are not good at cutting in with a brush, take the time to painters tape off all areas you don’t want to have sealer on with painter’s tape. (This doesn’t mean that once you have the tape on you don’t have to be careful.) You still do. You will have to remove the tape the next day after the sealer dries
All areas next to the home, building, porch posts, etc. requires concrete sealer applied one width of the chit brush. This allows you to roll over with the roller in the next step while providing you enough space to stay clear of what you don’t want concrete sealer on.
Once you cut in to everything with your clean brush, you must then apply the concrete sealer to the sides of exposed concrete. Yes, that means the sides of the front porch, sidewalk or driveway that is sticking out of the ground. Does this mean we HAVE to get all the way to the dirt in new construction? No. Use your best judgment in this and apply the sealer to the point you think will be back filled then go just a smidge further.
Now that you have cut in and applied sealer to the sides of everything it is time to start applying your concrete sealer with the roller!
Place your spent brushes on an extra piece of cardboard outside the area to be sealed so you can remove them during clean up.

Low cost roller frame
How To Seal Concrete Step 4 – Smallest and Highest First!
You are going to assemble the roller frame and roller cover that you will use for your concrete sealing project.

3/4 inch roller cover
Pick up the sealer and take towards the front porch. Set down on the sidewalk close to the porch. You are going to dip the roller directly into the container to obtain your concrete sealer product.
When you bring the roller up, keep it over the container. Tap – GENTLY – the metal arm onto the side of the container to remove excess concrete sealer. When the dripping is lessened, you are going to swing the roller from around and start sealing the top surface of the porch.
When you set your roller cover down be sure to be in the center of the porch from front to back and about a roller cover and a half (15 inches from the edge). This is due to when you first set your roller down it will have the most product in it. If you do it right next to an edge or next to where you already sealed there will be TOO MUCH sealer in one area. In this manner once you start rolling you have control of how much product goes where.
You want to apply the sealer evenly and ALWAYS keep a wet edge. This ensures there will be no time for the sealer to dry and you end up having a visible line in your final product where dried concrete sealer was covered with fresh concrete sealer.
Once you completely seal the porch pick up your container of concrete sealer and walk away from the porch about 10 paces while staying on the sidewalk.
How To Seal Concrete Step 5 – Rollin’, Rollin’, Rollin’
Set the container down and retrieve you extension pole. Firmly attach the roller frame to the pole.
 You will now be using the roller in this setup for the rest of the job.
Dip your roller, tap off the excess and start rolling out the sidewalk in the same manner you did the porch.
Contractor Insight Tip – (With the extension pole attached, I like to keep a very light grip and not apply pressure to the roller. I control the direction of the roller and the speed but I allow the cover and product to ‘do its job’ and apply the sealer.)
Once you have a thin even layer, it is time to reload your roller cover with concrete sealer product.
Continue this along the length of the sidewalk making sure too much concrete sealer does not pool inside the control joint grooves. (You want to end up at a groove – not start over one)
When you complete the sidewalk, it is time for the driveway.
How To Seal Concrete Step 6 – Keep Going!
Your driveway – if poured correctly – should look appear to be multiple large squares.
You will start closest to the garage and work one square at a time. Keeping mind of what direction you are going along with making sure you do not land lock yourself. You know – paint yourself into a corner.
Contractor Insight Tip – (Apply concrete sealer on the driveway concrete up to the expansion joint between the driveway and garage floor. Be careful not to apply sealer at this time to the garage floor visible on the driveway side of the closed garage door.)
Continue sealing your driveway with even amounts of concrete sealer until square by square you are complete.
Contractor Insight Tip – (If you need to grab a drink or take a QUICK break, you can do so upon completion of an entire square of your driveway. Just NOT IN THE MIDDLE of one!)
Whatever you do, make it quick and get back to sealing.
Once you have completely sealed everything you can then relax and take a deep breath.
Viola! All Done!
Few Final Thoughts About Sealing Concrete
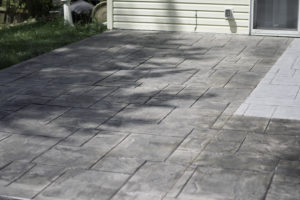
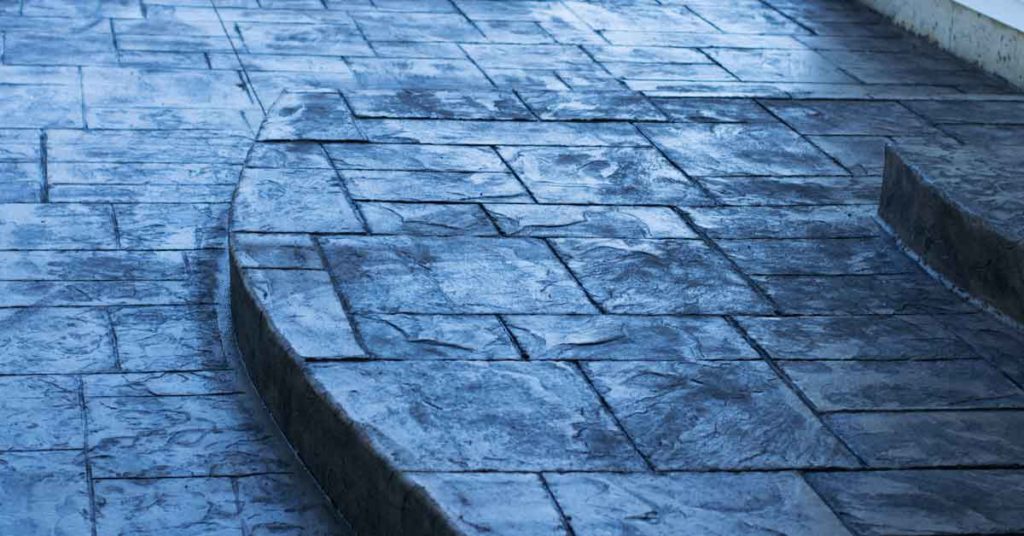
Stamped Concrete requires sealing to keep the release color ‘locked in’.
All Concrete benefits from sealing.
Concrete sealer is NOT one size fits all.
There are many variables to which makes for the right sealer for the task of concrete sealing.
Which is why one should adhere to the recommendation to patronize a Construction Supply like Carter Waters or similar
Prefer To Have Your Concrete Professionally Sealed?
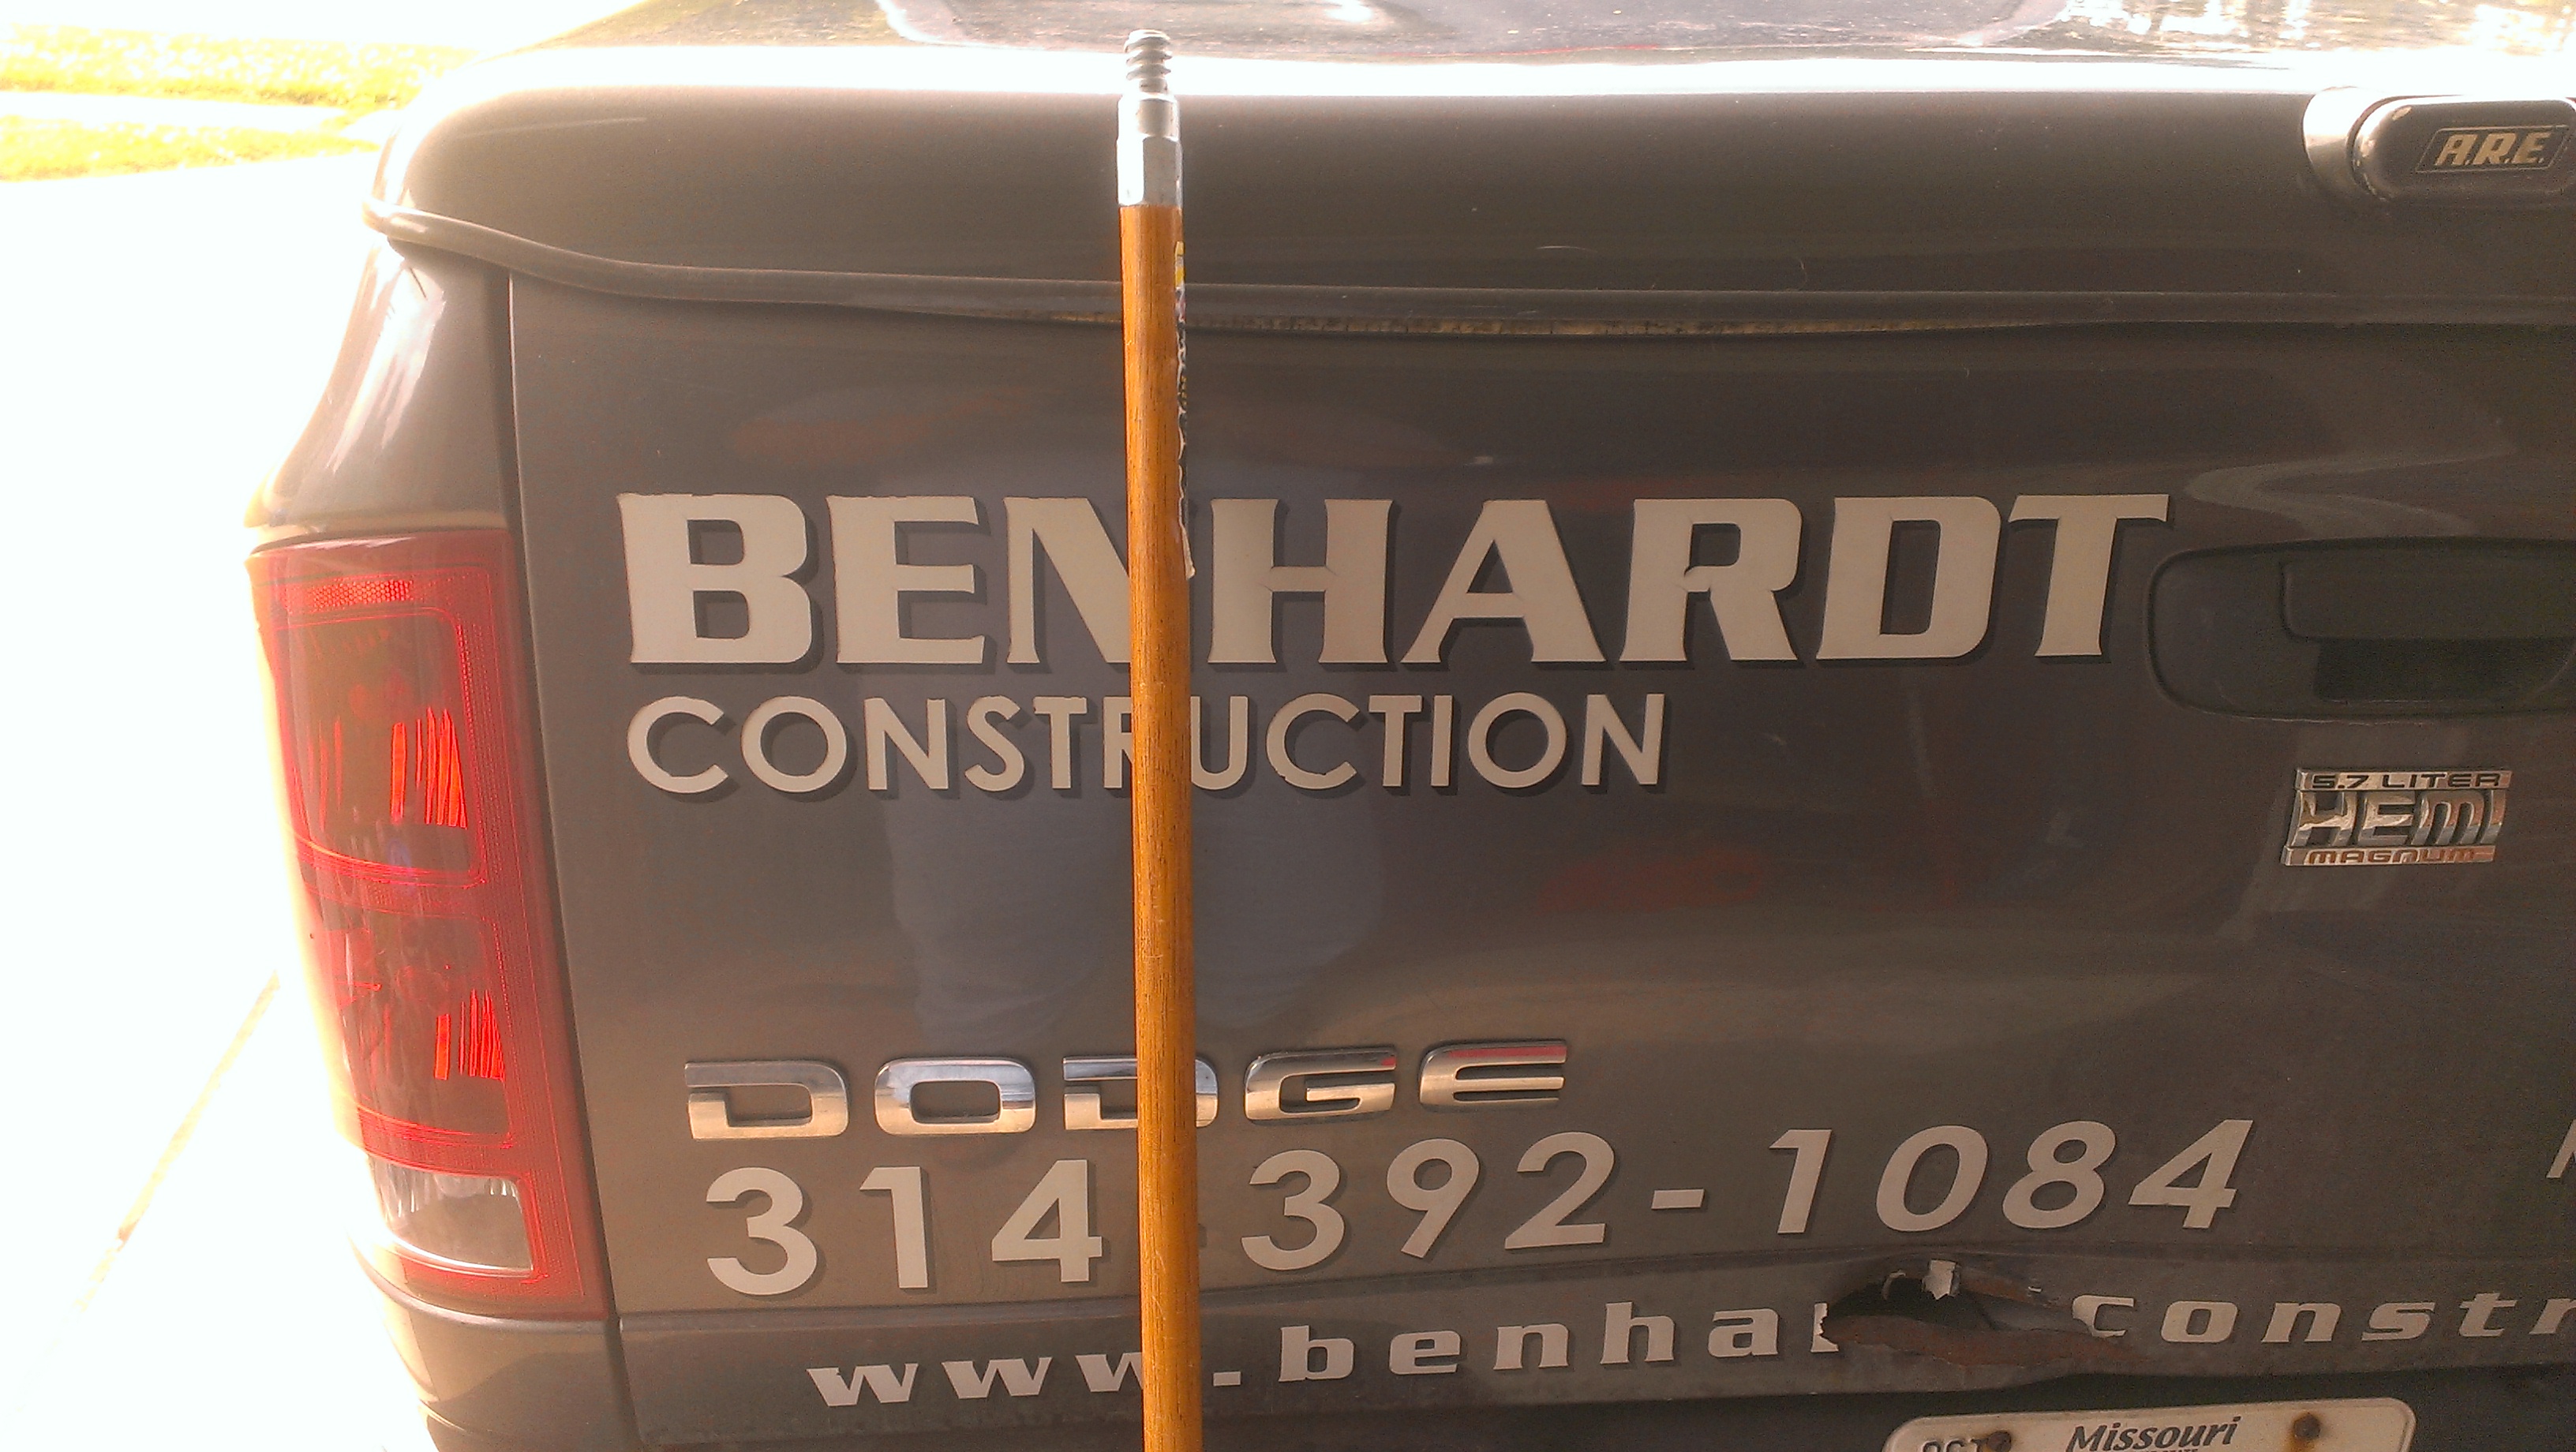
Simply Fill Out The Form Below to Contact Benhardt Construction
Benhardt Construction Serves Clients Whom Desire New Patio, New Driveway, Detached Garage, Room Addition, Outbuilding/Structure, Decorative Concrete, Stamped Concrete, Concrete Sealed In the Following Parts of Missouri
St. Charles County, Missouri; Lincoln County, Missouri; Warren County, Missouri; Bridgeton, Missouri; St. Charles, Missouri; O Fallon, Missouri; Lake St. Louis, Missouri; St. Peters, Missouri; Cottleville, Missouri; Dardenne Prairie, Missouri; Wentzville, Missouri; New Melle, Missouri; Weldon Spring, Missouri; Foristell, Missouri; St. Paul, Missouri; Josephville, Missouri; & Beyond
Reach out today letting Benhardt Construction know more about your project!
Quartz Counters May Be the Best Option for Your Kitchen Remodel
Quartz Counters Are Today’s Best Option for Your Consideration
 Low Maintenance and Anti-Microbial are two major benefits of Quartz which jumps out to me being a practical designer of kitchens. Never having to seal your counters nor worry about nasty germs and bacterial hiding within the surface saves you time, money and is better for your health.
Yes, Quartz is at a higher price point initially. The long term cost factor far out performs many other options in today’s market.
A few extra dollars upfront provides you copious years of use and enjoyment. Factor in the wonderful resale value if and when you place your home on the market.
You really have yourself a winner with Quartz Counters.
How Quartz Counters Are Made
Quartz Counter tops are a manufactured stone product which utilizes one of the hardest minerals on earth, which is quartz.
Quartz is crystallized silicon dioxide (SiO2), this mineral can either be imported from Brazil or be mined from the ‘quartz belt’ in Arkansas.
In 1812, Friedrich Mohs created the Mohs scale that ranked mineral hardness on a scale from 1 to 10. Talc being the softest at 1 and Diamond being the hardest at 10. Quartz proudly comes in with a hardness ranking of 7.
A quartz counter top will be comprised of 93-94 percent quartz with a 6-7% polymer resin binder and pigments.
The resins and binders bond with the quartz in the manufacturing process that results in a non-porous finished product. Thus, making a quartz counter top antimicrobial leaving stain and odor causing bacteria, mold and mildew unable to penetrate the surface.
Quartz Maintenance
A quartz counter top never needs sealing like natural stone or wood counters and all that you need to clean a quartz counter top is warm soapy water. Rinse clean with a wet rag and towel dry to have your counter top look just like the day it was installed in your home!
If there is ever tough dried food matter a gentle cleaner is all that is required.
Not only are quartz counter tops one of the more durable counter top options you can choose for your kitchen it also has a vast variety of color options.
Quartz Versatility
It truly is amazing how close to ‘real stone’ that quartz counters can be. While mimicking the real stone in looks, being manufactured allows for the addition of pigments, flecks, glass and dyes that can end up with jaw dropping results.
The boundaries of these counter tops are expanded and pushed directly through competition. While the manufacturing process is virtually the same for each manufacturer…this is due to Sir Marcello Toncelli having the vision to patent the machine that resides worldwide in over 60 manufacturing plants.
Quartz Boundaries
The competition in the quartz counter top industry constantly pushes each brand’s creativity to in development of new colors, lines and styles!
The combinations of materials are unique to each individual producer listed below.
- Silestone
- Radianz line by Samsung
- Viatera line by LG manufactured in Adairsville, Georgia
- Zodiaq by Dupont manufactured in DuPont’s Granirex plant in Thetford Mine, Canada,
- Quartz Design Trends
With quartz counter tops coming in a wide variety of colors and patterns – there should be a choice available to compliment your design.
A popular feature trending is the ‘waterfall’ island, where the quartz is used for the counter top surface and one or more sides of the island. Fabricators create a ‘flow’ effect by keeping the pattern of the quartz consistent at the corner of the top and side resulting in a waterfall appearance.
A quartz counter top is a solid investment that you will be able to enjoy for many years. The vast array of colors and styles available ensures that your final selection is the perfect choice for your kitchen, bathroom or bar project.
Home Dog Bathing Station Design
Eliminate Muddy PAWS Inside Your Home Once and For All!
With a Convenient Home Dog Bathing Station In Your Home!

It is nice to schedule a grooming session at Petsmart, Petco or your Local Neighbor St. Charles Dog Groomer but what about the times in between appointments?
Would it be awesome to be able to conveniently wash off your dogs muddy feet before tracking up your Home?
Or how about a quick bath because Fido rolled around on a fallen bird (and you definitely do NOT want to ride to the groomer with THAT smell!)
Imagine have a convenient dog bathing station right in your very own home. Home Dog bathing stations designed and built to keep the wetness exactly where it belongs while keeping EVERYTHING you need from Dog shampoo, to hair dryers to towels within easy reach!
Put an End to Those Muddy PAWS Inside Your Home Once and For All!
This Custom Dog Bathing Station Design Includes:
DAL-TILE Fabrique Blanc Linen P685 Tile
CAMBRIA Oakmoor Style Quartz Surfaces
CRYSTAL CABINETS Catalina Cabinet Drawer Fronts
BENJAMIN MOORE Wall Paint
5 Important Questions That Must be Answered for a Great Concrete Project
Whether you are considering a new concrete driveway, concrete sidewalk, concrete patio, concrete porch in ONE OF THESE FINISHES – the following article will give you insight to vital questions that need to be answered BEFORE you embark upon your concrete project.
Ready to learn more about your next concrete project? Here we go!
Roads, bridges, schools, house foundations, driveways, patios. On and on…
Do you realize how much concrete there is in the St. Louis region?
Crazy if you stop and think about it, right?
Concrete is a wonderful product if done correctly.
Careful consideration must be a part of the concrete process.
At a minimum your concrete contractor should know the answers to the following five questions.
WHO is the concrete for? Does the homeowner just want a solid surface or does aesthetics play a critical role in the project?
WHAT is the concrete to be used for? A walkway, driveway, foundation, patio, pole barn or garage floor, shed or hot tub pad?
WHEN is the concrete to be poured? In the heat of the summer, the uncertain spring weather, the cold of the winter, the falling leaves and temperature of the fall?
WHERE is the concrete to the placed? In the front of the home with easy access, around the rear of the home with zero equipment access, far removed from a road so the concrete has to be transferred long distances?
WHY is the concrete being poured? Is it form, function, necessity, new or replacement?
Once these questions are answered you should be well on your way towards a great concrete project.
The answers to these questions are important because they are what makes your project unique. The answers help determine the true costs of your project that covers all the bases.
The cost of your concrete project should be clearly stated up front and contain little to zero additional cost at the end of the project.
(If there happens to be additional costs they should not be a surprise as your contractor should have clearly stated early on that there may be some factors unforeseeable.)
You can call a handful of concrete contractors in St. Louis County and St. Charles County – if they pick up the phone or call you back – they may provide you a price right over the phone.
That may work for them but that does not work in my eyes nor should that work for you.
That type of pricing is considerd the ‘law of averages pricing’. Some of their projects will be profit home runs and some may be profit single base hits or worse yet, profit strikeouts.
Now you may have already thought, “Heck yeah, I want to be in the profit strikeout category. What do I care if he makes any money?! I’ll get my concrete done for cheap and put the rest of the money in MY pocket!”
What do you think happens when a ‘law of averages pricing contractor’ is in the middle of a slump? Worse yet, during that slump it happens to be your turn at bat?
Will there be corners cut? Will you have the proper amount of rock under your concrete? Even better, will your concrete be the proper thickness? How about respecting your property and the neighbors property?
Will encroachment onto your neighbors property from equipment or foot traffic cause an irreparable rift between you and your neighbor that you have to live with until one of you moves?
Will your home be protected from the demo and placement of the concrete?
Will your project be manned with the proper amount of people for the pour so your project will be finished well?
Will the proper amount of wire and rebar be used?
I can continue on but I imagine that you are understanding my intended point.
Nobody, in my opinion, can provide a proper concrete estimate over the phone. This is not widgets being sold or that you are buying.
While there are many similarities between concrete projects there is just as many, if not more different variables.
All of that MUST be factored to ensure that your concrete project ends up with wonderful results that you can use and enjoy for years to come.
Yes, everybody wants to the best possible price. Whether it’s a new truck, concrete or TV. At the same time how much is it going to cost you if you buy that truck, concrete or tv at a perceived ‘low price’ and it turns out that 6 months down the line they stop working and falls apart? With nobody to turn to because that provider is out of business or refusing to back up their product, at this point you are out your initial ‘low price’ plus now the real cost of the product you should have paid in the first place.
While thinking you ‘got away with one’ it actually ended up costing you 1.5 times or more the authentic cost you should have originally paid.
My intention with this article was to plant a few seeds that will hopefully be remembered and considered when it comes time for your concrete project. Do your homework when it comes to your concrete project and you and I both will be happy that you did.
Let’s Talk About Your Concrete Project and Get You Your Free Quote!
You may be interested in the following article:
Or these videos:
Design/Build:
Backyard Makeovers
Detached Garages
Detached Buildings
Room Additions
And
Replacement:
Stamped Concrete Patios
Exposed Concrete Patios
Broom Finish Concrete Patios
What to Watch Out for When Updating Your Kitchen Counter Tops
Upgrading your kitchen counter tops can be fun and an exciting time – but please take into consideration the following insight.
Are all the cutout fees included?
What edge profiles are included?
What edge profiles are an up charge and how much so?
How will your new counters interact with your current backsplash?
Under mount or top mount sink?
Stainless steel, composite, porcelain or other type of sink?
Does the fabricator digitally template and then use a machine?
Will they template your replacement counter tops with the old counter tops in place?
If you are going with a large under mount sink with a disposal – is the rough plumbing in the wall low enough?
Does their price include disconnection of the plumbing?
Will they caulk the new counters?
Does their price include delivery and installation? Does the price they quoted you include the sales tax already?
Does their price include reconnection of the plumbing? Dishwasher? Stove? Cook Top? Etc?
What about removal and hauling away of the old counters? Without damaging the tile, cabinets, flooring, appliances, doorways or anything else that is staying current?
What type of warranty do they provide for?
If the counters need sealing – will they provide the first coat along with care and maintenance instructions and explanation?
There are a few, not all, counter top providers that make it to where there is a lot of fine print and hidden fees that you do not find out about until it’s too far into the game.
Sometimes these things are discovered after the deposit is paid and is nearly impossible to get back.
You should be playing on a level playing field as you determine whom is the best option for your new counter tops.
If the floor plan of your kitchen works for you and your cabinets meet your expectations then upgrading your counter tops is a great way to improve your kitchen. Just be sure to factor in whether you want to change your sink, faucet, back splash at the time in order to have the proper budget set.
Also of note, when changing the back splash is the best time to upgrade to under cabinet lighting if that is something you desire. The holes made by the electrician to run the wires for the under cabinet lighting can be repaired before the new back splash is installed.
There is much more information in the LEARNING CENTER available to you.
You may be interested in the following articles:
How Can a Remodeled Kitchen Improve My Health?
What Exactly are Quartz Counters and Are They a Smart Choice for My Kitchen Remodel?
Or this video:
Just a few pieces of trim…
Recently a customer contacted Benhardt Construction about needing “just a few pieces of trim re-nailed to the wall, as they had just had new hardwood flooring installed.”
Had Benhardt Construction done the installation, the trim would been removed by Benhardt Construction and re-installed as we always do for all of our flooring installations.
Aside from that, she wanted a pantry door reversed from swinging inward to outward so that she could make more use out of her space. Something I was fully behind as Benhardt Construction is all about maximizing existing space and functionality.
In short, I wanted to share with you the list of tools that was needed for this, “just a few pieces of trim re-nailed to the wall, as they had just had new hardwood flooring installed,” project.
Nail Punch – Knock Out Hinge Pins
Hammer – Strike Nail Punch, Mini Wrecking Bar, Shims, Old Nails, Chisel
Utility Knife – Cut between trim and drywall. Cut between trim and jamb. Cut Shims
Sawzall – Cut existing door fasteners
6 Inch Blade for Sawzall –
Mini Wrecking Bar – Pull Trim
Flat Razor Blade – Remove excess caulk from trim work and drywall
Multi Tool & Cutoff Blade – Cut existing trim as needed for new door jamb placement
Shims – Stub out door jamb plumb
Cordless Nailer – Mechanical means to fasten door jamb
Nails – Fasten door jamb
6 Foot Level – Plumb door jamb
2 Foot Level – Level line across for trim transitions from hardwood flooring to sheet vinyl
Pencil –
Tape Measure –
Miter Saw – Cut new wider pieces of trim to account for transition height difference
Jigsaw – Scribe cut new trim over molding transitions
Chisel – Complete what Multi Tool above could not
Extension Chord –
Three Way Extension Cord Adapter – Save time from not plugging and unplugging cords for tools
Spackle – Fill in holes of existing trim
Extra 3 1/4 Inch Trim – Replace trim next to door jamb as it was too short from resetting door
Extra 4 1/4 Inch Trim – Use to transition from the now higher height of hard wood to sheet vinyl
Broom – Sweep up as we always do!
Dustpan – Pick up the sweepings to leave it cleaner than we found it as we always do!
25 things were needed today for ‘just a little job’. Plus the trim pieces had to be procured before today so that was a trip to the mill yard in and of itself.
This project went great and the customer was happy, happy, happy.
The moral of the story is that it’s not always ‘just a little job’. There are a lot of tools, materials, experience and logistics that can go into even the ‘smallest of projects’
If you have a ‘small or large’ project around your home, contact Benhardt Construction today!
Humidity in your winter home
How many people have sinus infections or nasal issues during the winter months?
How many of you have nosebleeds more noticeably during the winter months?
Did you know that during the winter months your humidity levels inside your home should be between 30-40%?
If you have a humidifier on your heating system you are ahead of the game. You should consider checking the settings. Making sure it is on. Clean and check the filter if your humidifier has one to ensure it is free of debris and mold.
What if you don’t have a built in humidifier on your heating system?
Simple!
Find a medium size pot. Usually people have an older pot they don’t use much but still won’t throw it away. Now you can put that to use!
Fill that pot up three quarters full. Set it on the back burner of your stove. Turn the heat to medium and walk away. You can speed the process up by turning the burner to high but be sure to not leave it unattended!
You can do this once a day if need be. You can throw a little lemon zest into the pot. A few drops of vanilla. Cinnamon. Anything you have in the spice rack or fridge can ultimately add an aroma to your home while you humidify it.
The proper humidity levels help with your heating bill. By raising the humidity you don’t ‘feel’ as cold and will be able to turn your thermostat down a few degrees once proper humidity levels are reached.
Proper humidity helps with you hard wood flooring by helping it from shrinking. As well as nearly everything in your home!
While there are humidifiers that can be purchased that stand alone, I don’t recommend them. Filling them can be inconvenient and cleaning them can be a pain. If not properly cleaned, mold may grow and you will literally be blowing vaporized mold into your home.
The only downfall to the pot on the stove method is that you can’t leave it unattended for a length of time. While making the family meal of the evening one could do make use of an unused burner. Or while dishes are being cleaned the pot can be on the stove then.
By getting your humidity levels up to 30-40% you will be able to bear Old Man Winter a little easier.